Function: Data Automation
Optimisation of work processes and increase in productivity
This chapter explains the Data Automation function, how to create calculations, set up alarms and define appropriate measures. By using these functions, it is possible to react more quickly to events. Analyses of machine data are helpful for informing users about anomalies at an early stage.
Overview:
Calculations Setup
Clicking on the submenu item Calculations Setup takes you to the following overview page. Once calculations have been created, they appear in a list view. The calculations can be subsequently edited at any time.
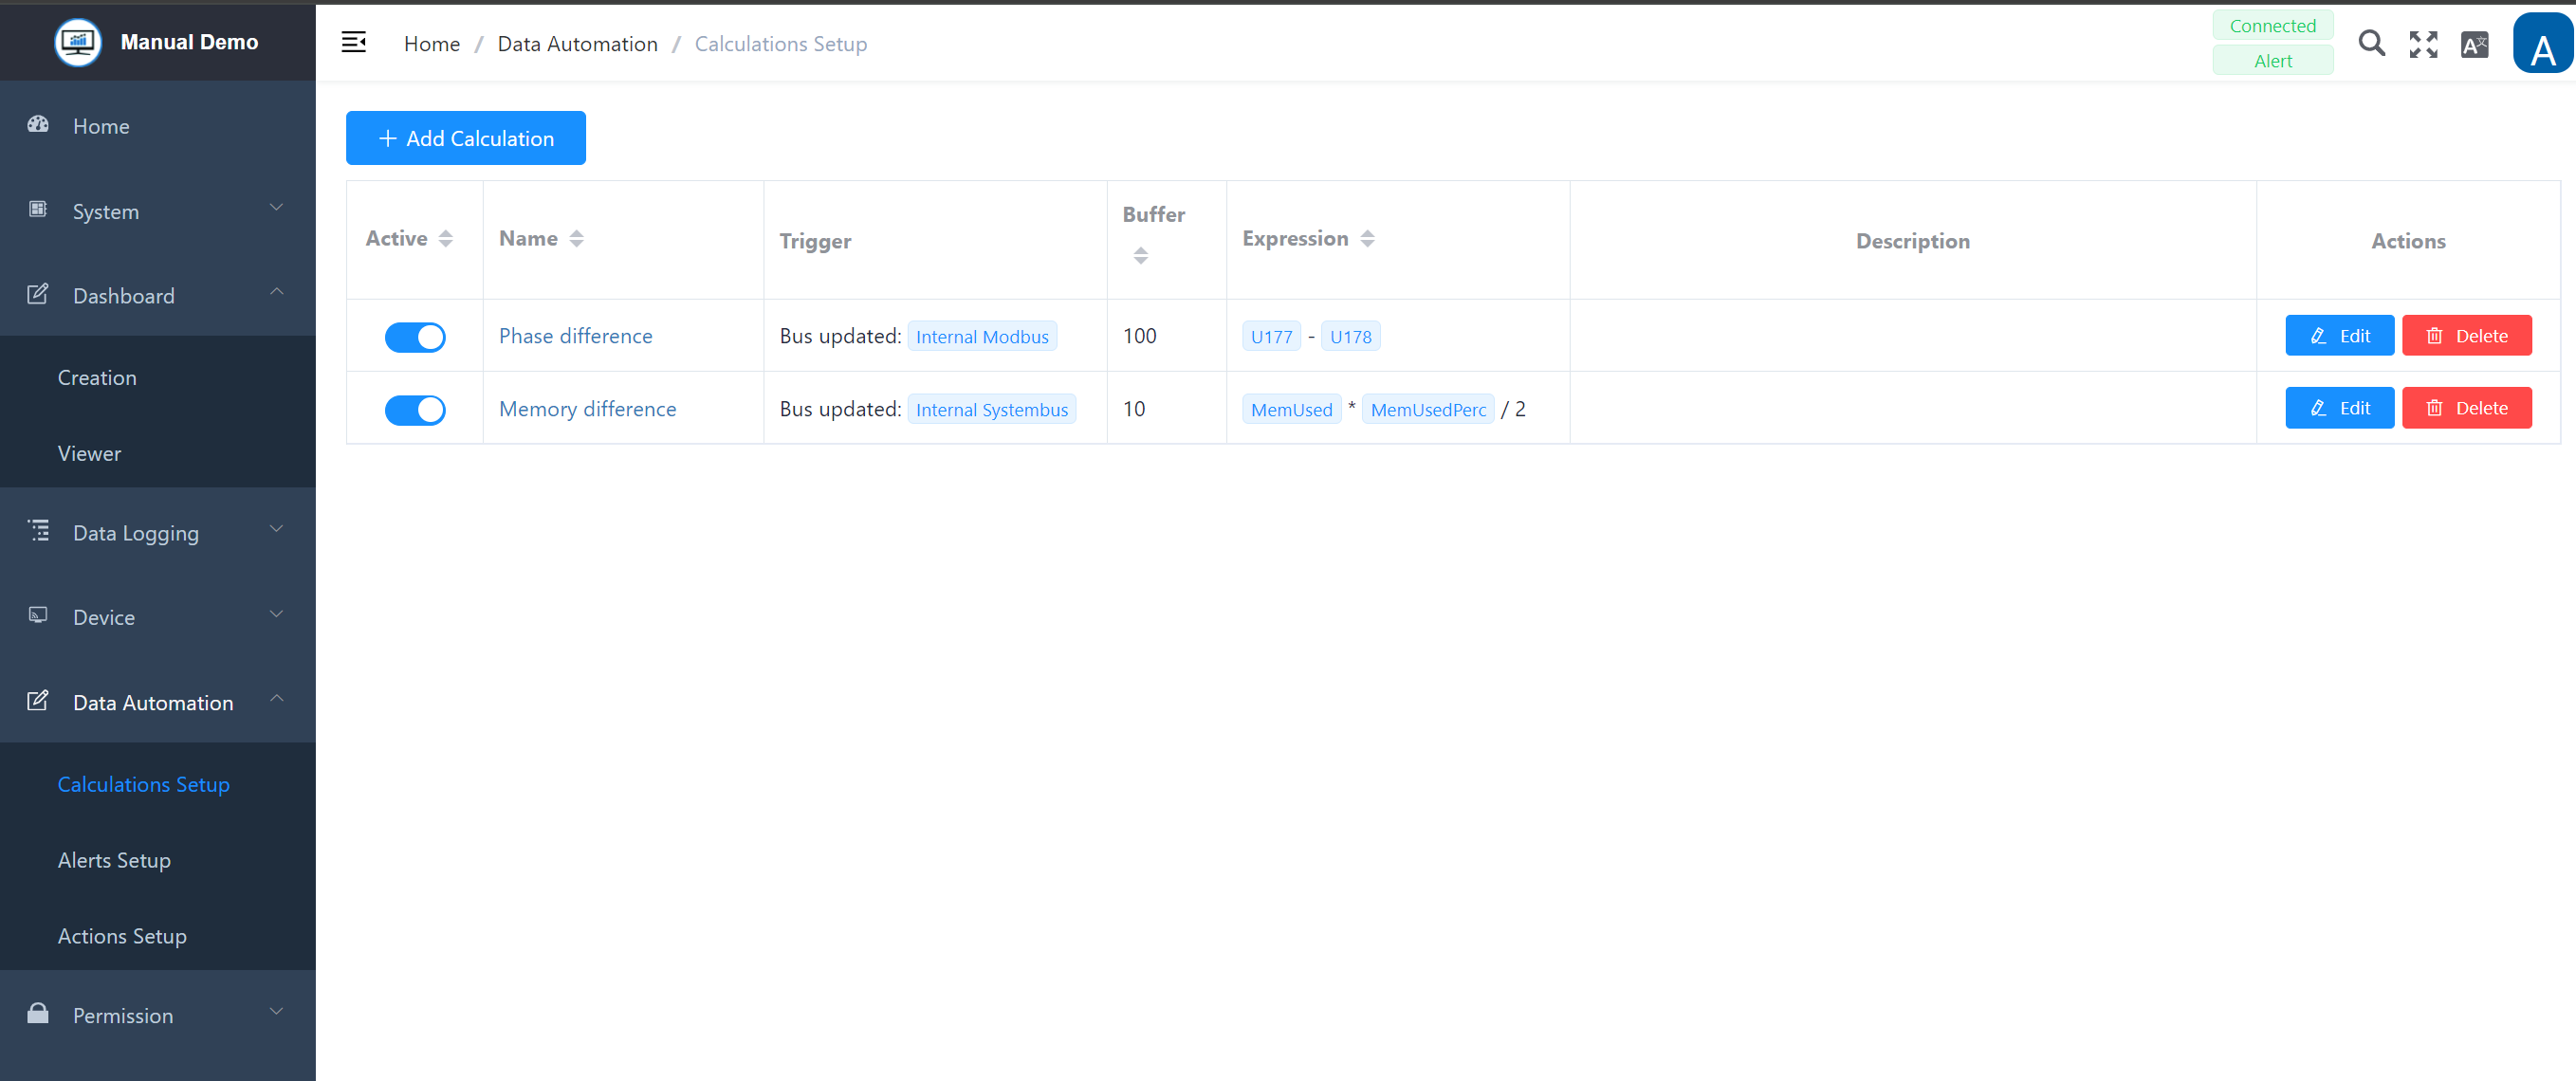
Add Calculation
Clicking on the Add calculation function opens another window with an input screen. All data required for the individual calculation must be entered here.
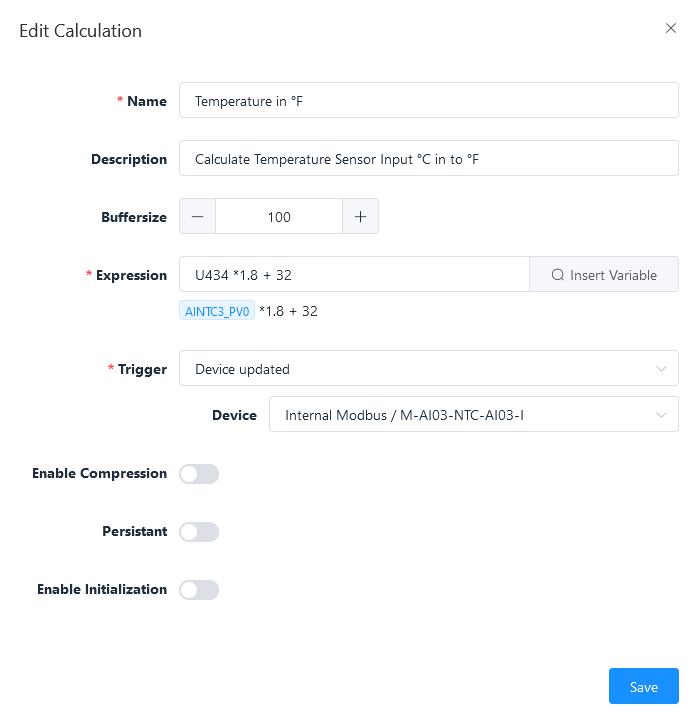
Edit Calculation - Settings
| Field | Description |
|---|---|
| Name * | Assigning a name |
| Description | Optional; Enter a description for easier identification |
| Buffer size * | Definition of number of intermediate storage of values, default 10 |
| Equation * | Selection of the variables created using the search function, designations defined by the system, definition of the equation |
| Trigger * | Specify what exactly should trigger the calculation. Several areas are available for selection via a drop-down menu |
| Enable compression | Operate slider via mouse click, if activated; the value of the variable does not change and no new data point is generated, but the previous value is always used |
| Persistent | Operate slider via mouse click, if activated; values of the variables are retained and not deleted |
| Enable initialization | Operate slider via mouse click, Assignment of an initial value or initial state of a variable that contains 0 in an equation at the start of the calculation |
Note: All fields marked with * are mandatory.
The following actions are available for created calculations:
| Action | Description |
|---|---|
| Edit | Opens the data entry for editing the details |
| Delete | Removes the device from the system. (A warning notice must also be confirmed) |
Example Calculation:
Alerts Setup
Clicking on the submenu item Alerts Setup takes you to the main overview page. Once alerts have been created, they appear in a list view. The entries can be subsequently edited at any time.
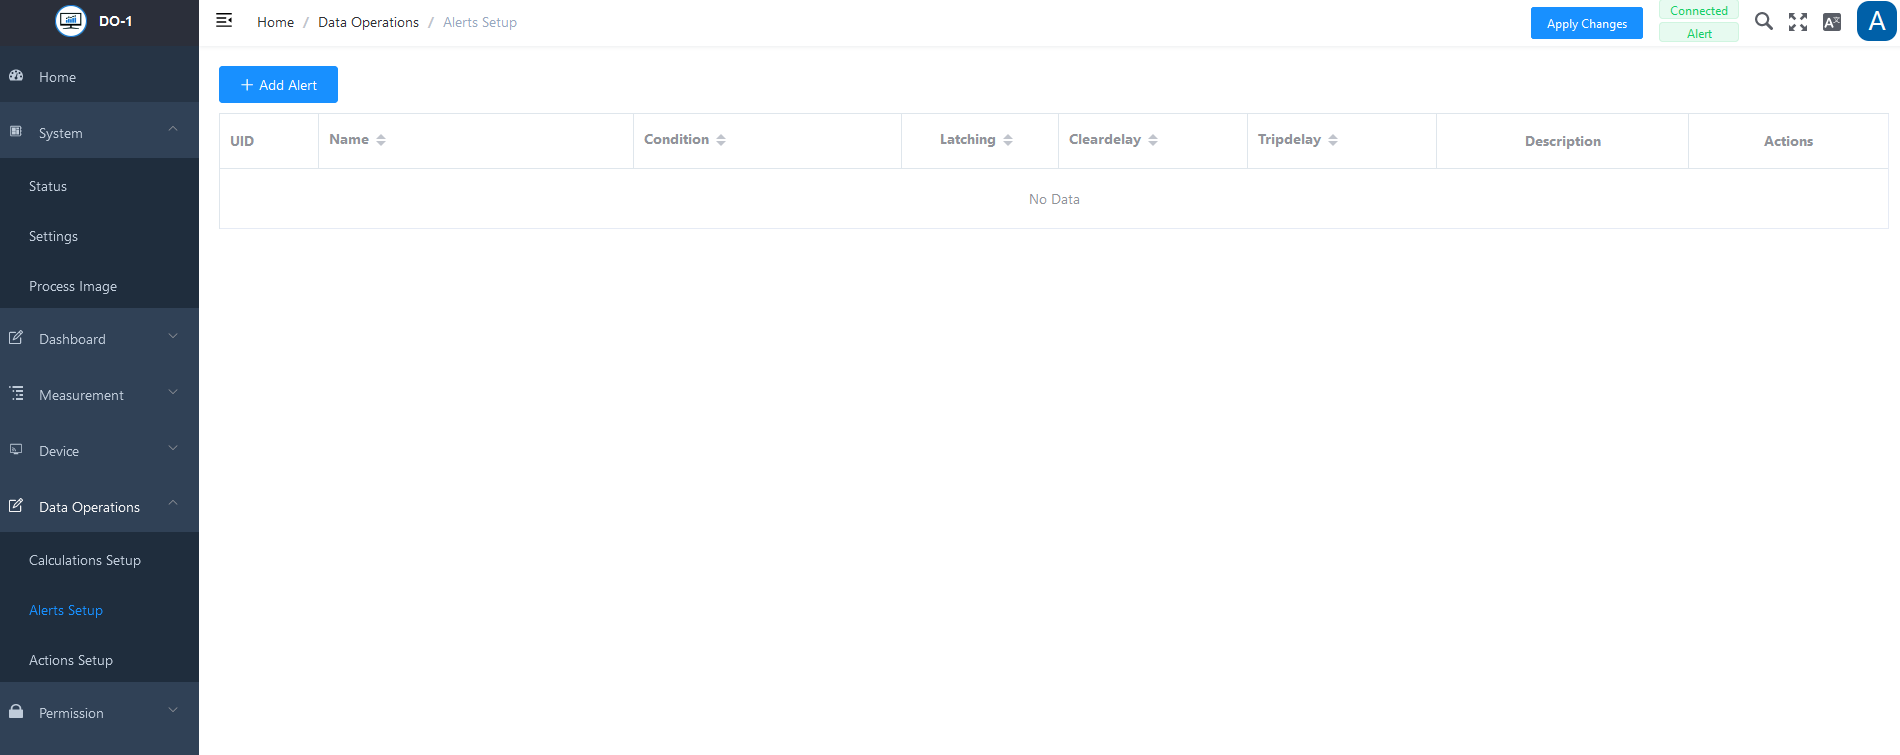
Add Alert
Click on Add alarm to open another window with an input screen. All the necessary settings for the corresponding alarm must be entered here.
Edit Alert - Settings
| Field | Description |
|---|---|
| Name * | Enter an individual designation |
| Description | Enter a description for more precise identification |
| Source * | Definition of the starting point for the alarm message |
| Operator * | Definition of the formula when the alarm message should be triggered |
| Threshold * | Specification of the value above or below which the alarm is to be triggered |
| Latching | Operate the slider via mouse click; if active, the current status is retained even after the input signal that triggered it has been removed |
| Clear delay (S) | Definition of the seconds after which the delay is to be cancelled |
| Trip delay (S) | Definition of the seconds after which the alert should be triggered again |
Note: All fields marked with * are mandatory.
Example Alert:

The following actions are available for created alerts:
| Action | Description |
|---|---|
| Edit | Opens the created alert for editing the details |
| Delete | Removes the alert from the system. (A warning notice must also be confirmed) |
Actions Setup
Clicking on the submenu item Actions Setup takes you to the main overview page. Once actions have been created, they appear in a list view. The entries can be subsequently edited at any time.
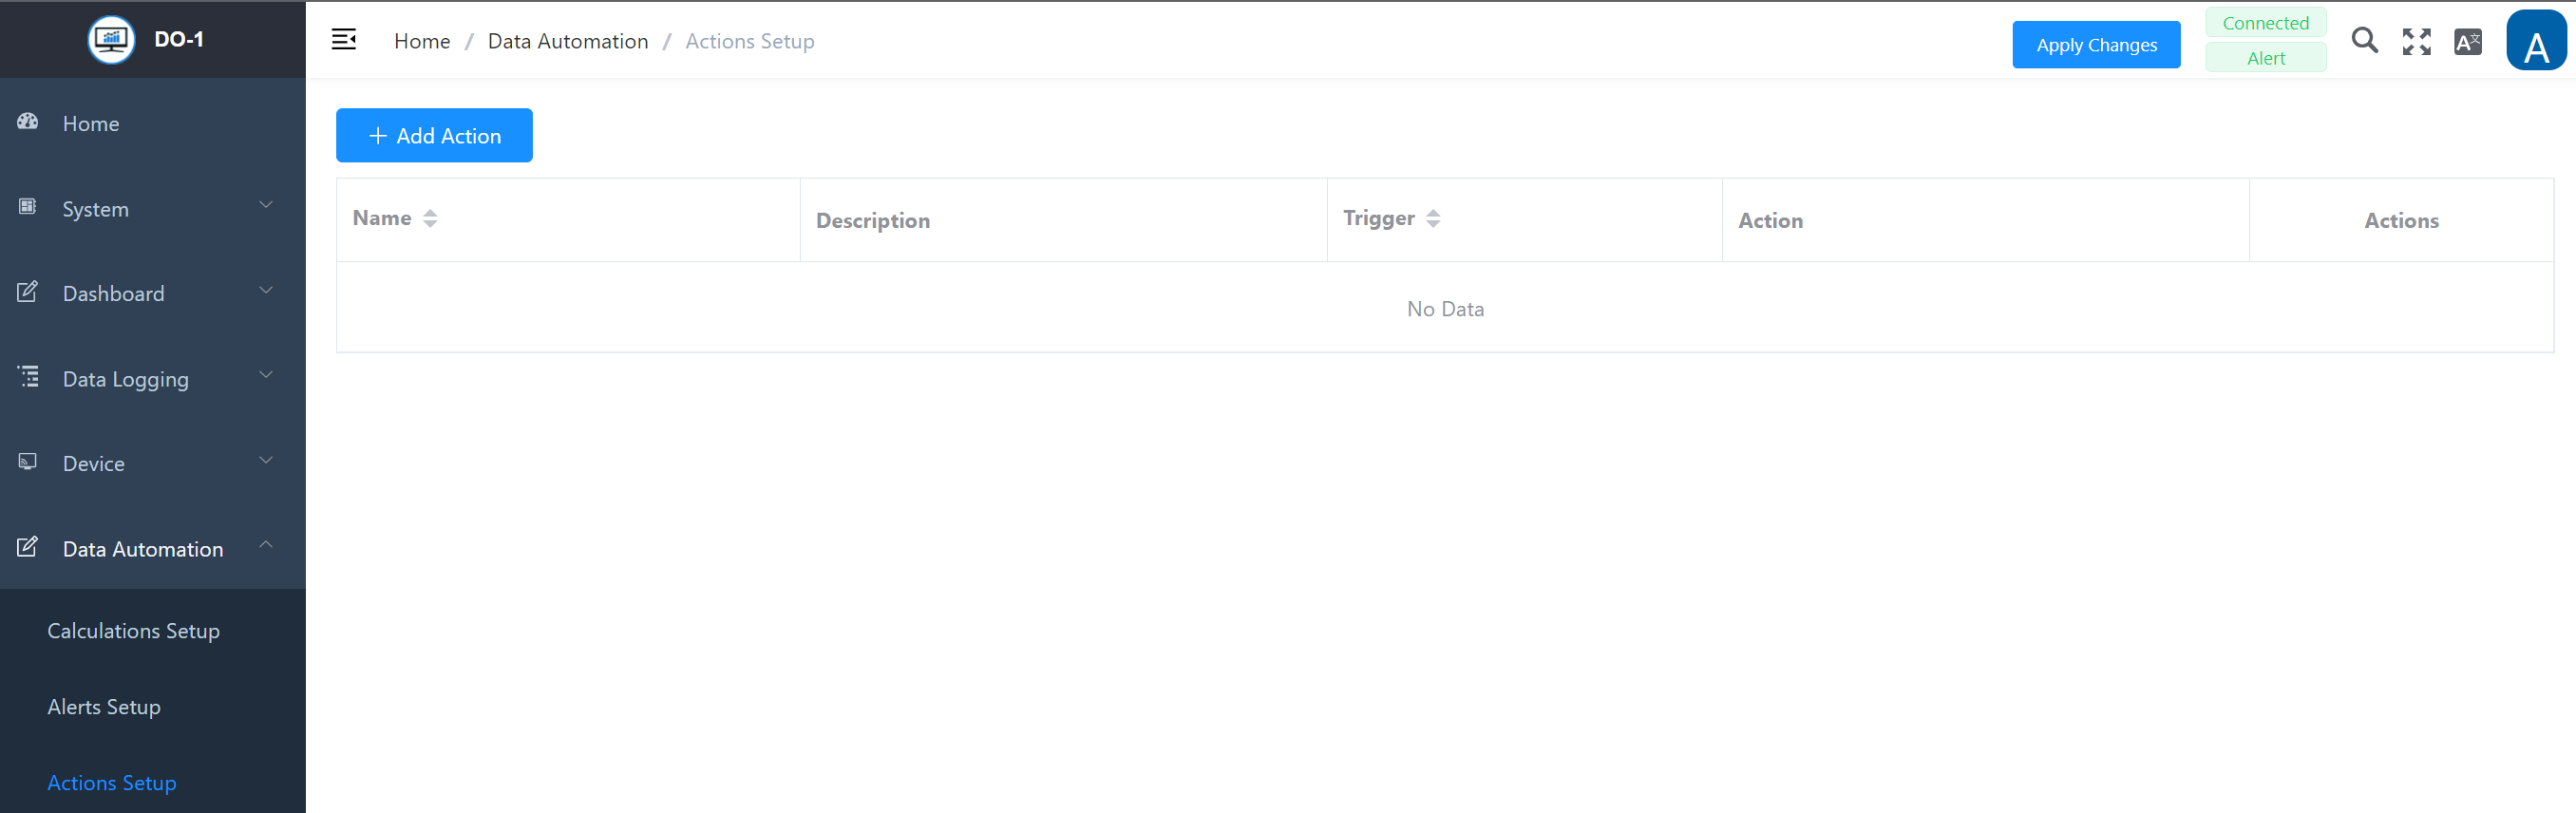
Add Action
By clicking on Add Action another window with an entry masks opens. Here all necessary information for the action are to be entered. There are several trigger and action options to choose from:
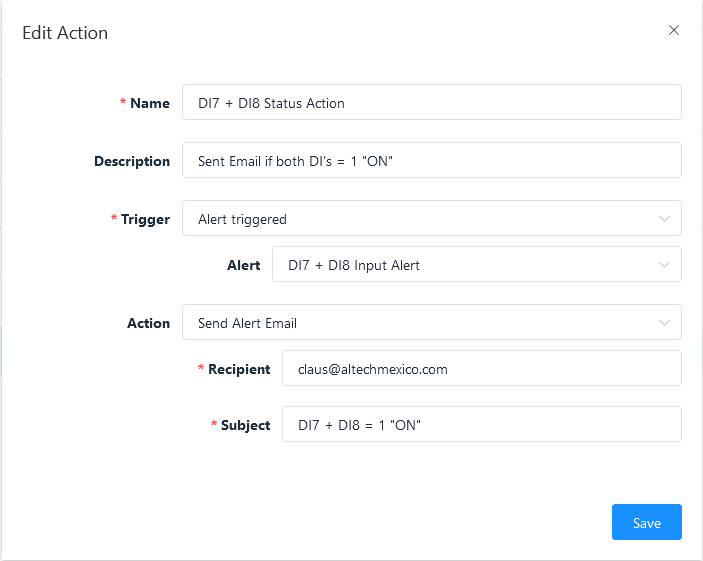
Edit Action - Settings
| Field | Description |
|---|---|
| Name * | Enter a designation |
| Description | Enter a description for more precise identification |
| Trigger * | Specify what exactly should trigger the action. Several areas are available for selection via a drop-down menu |
| Action * | Select from drop-down list |
Note: All fields marked with * are mandatory.
Example Action task:
The following actions are available for created actions:
| Action | Description |
|---|---|
| Edit | Opens the created action for editing the details |
| Delete | Removes the action from the system. (A warning notice must also be confirmed) |